Friday, December 9, 2011

A gorgeous sunrise in Illinois

We woke up yesterday at 4:30am, and decided to just go with it.  After getting some work done on a few upcoming changes with our website, we were rewarded with a spectacular sunrise.  Sometimes it pays off to lose a little sleep.  Happy Friday!


Monday, November 7, 2011

Understanding the Image - Combining Flash and Available Light


As promised, here is Jordana Wright Photography's second "Understanding the Image" tutorial, based on a photo from our recent shoot with Chris Harris - then of the Chicago Bears, and now of the Detroit Lions.  Little did we know, as we walked around downtown encountering Chris' fans and admirers, that this would be his last public foray as a Chicago Bear.  He was released by the Bears less than 24 hours after the shoot, and picked up by the Lions only another 24 hours or so after that.  It was very interesting to negotiate a large metropolitan area with a celebrity,  encountering all of things involved with having notoriety.


As we explained in our last Digital Classroom post, part of the challenge of on-location shoots is finding dynamic and interesting lighting opportunities in which to feature your model.  On our recent shoot with Chris Harris in Chicago, we wanted to frame him in the lights, reflections, and atmosphere of the Chicago River at night.  As one might imagine, shooting portraits at night presents a number of challenges, including:

  • balancing exposure between the subject and their surrounding environment
  • selecting appropriate white balance
  • working with flash: direction, intensity, color, etc.
  • preserving detail within the image, despite low levels of light 
  • shooting with the lowest ISO and fastest shutter speeds possible

Understanding the Lighting

The above photograph features many sources of lighting, and was particularly challenging, despite its apparent simplicity.  There are lights of the buildings across the river and the sky serving as Back Light, there are streetlamps outside of the frame providing low levels of Fill Light for the subject, and there is an off-camera flash serving as the Key Light on the subject.  Because we were working with a moveable source of light (the off-camera flash) as our Key Light, we had the ability to adjust Chris' pose and position within the environment as we saw fit.  In this situation, we used a Canon Speedlight 580EX II with an Impact Universal Bounce Diffuser and an amber colored gel.  We wanted this series of photos to feel candid and realistic, so it was very necessary for the flash to provide a similar quality of light that wouldn't seem out of place to the surroundings.   Traditionally, flash is a very bright, vibrantly white light source, so we chose an amber gel (Rosco 16) to warm the light significantly.  Anytime you work with gel, it is important to remember that the flash isn't going to behave normally within the settings you are accustomed to.  Gel will reduce the amount of light that passes through it (known as "transmission") based on the saturation of color you have selected, so it will take some tweaking of settings to find the perfect balance.  The amber gel we selected was a very close match to the color of light cast by the street lamps in the area (these were High Pressure Sodium lamps, which cast an orange-ish light).  Before we embarked on the shoot, we also tested the amber gel against our subject's complexion, as different skin tones can highlight, washout, or sometimes react adversely to different colors of lighting.  

Steps in Creating a Lighting Design:

  1. Determine the Key Light.  The Key Light is the primary source of illumination for the photograph or scene.  In this example the Key Light is the amber colored Flash, firing from low on the model's left hand side.  We specifically chose to fire the flash  from slightly below the subject's chest height to ensure complete illumination of his face, even under his hat.  When determining the Key Light in your own lighting compositions, imagine that you have only one light to use- where would you put it, what color would it be, from what angle, and why?  The Key Light should satisfy all of those requirements.
  2. Determine the Fill Light.  Fill Light serves to provide general illumination and balance to the photograph.  Fill Light will highlight features, eliminate shadows, and in some cases provide a different color source in an image.  In this image, like in our first Digital Classroom post, we again have two colors of fill light -- moderate and deep blues reflected off buildings from behind the model and to his right, and the orange glow from above the model and to his left, from streetlamps.
  3. Determine other lighting sources.  Backlight is present in this image, however due to the time of day, the sources blended almost completely into the Fill Light and did not need to be considered.  In other images additional lighting sources can add color, intensity, or depth to the lighting composition, often helping to separate the subject from the background.  In this image the back light given off by the sky does provide a small amount of separation between the subject and the background, as well as providing a stunning depth to highlight the buildings against.
  4. Determine the balance.  This is the critical step, best learned through practice or trial and error.  In this case, the balance was perfected by adjusting the location, intensity, and angle of the Key Light (the flash) until a perfect blend with the orange Fill Lighting was achieved.  There are usually several ways to achieve any given look with lighting, and it is important to experiment with all of the possibilities to see which works best for you, in your given circumstances.  For instance, in this image the intensity of the Flash was reduced by moving the Flash farther away from the subject, as opposed to changing the power settings.  Any adjustment will have its own consequences.  By moving the Flash farther away, the light has a larger spread and will illuminate more of the subject, which in this example we wanted.  Reducing the power of the flash was out of the question for this shot because we needed the extra intensity to make up for how much light the amber gel absorbed.  


Understanding the Posing

When working with a subject who has never modeled before, it is very important to pose them in ways that feel both natural and comfortable.  Each photographer has their own techniques and ideas for communicating posing to a model, and rarely is one technique superior to another.  It all boils down to the individuals taking part in the shoot.  In this image, I physically demonstrated the basic stance that I was interested in achieving, and then allowed Chris to make it his own.  The most important aspects of this pose are the placement of his right hand on the railing, and the angle of his body towards the camera.  By positioning his hand on the railing, the subject is grounded within the frame and his body becomes a natural extension of the through-line that the railing provides.  The 45* angle of his body towards the camera has an inherently relaxed and candid feel-  much more than a square or straight-forward pose would provide.  By positioning the camera just below the model's eye level, he holds a position of physical power and prominence -- literally looking from slightly above the viewer of the image.  In addition, I took great care to place him within the frame in such a way that several architectural lines of the surrounding buildings converge on him, pulling even more focus to the center and therefore the subject. (demonstrated below). 


Understanding the Camera Settings

This image was shot with a Canon 60D and a 17-85mm f/4-5.6 lens using the following settings:
·       RAW
·       ISO - 800
·       White Balance - 5650K
·       Shutter Speed - 1/25
·       Aperture - f/4.0
·       Off camera flash triggered wirelessly

As always, this image was shot in RAW to capture as much data and detail without file compression as possible.  This allows for more versitility in editing and can save shots that would otherwise be discarded.  Particularly in complicated lighting scenarios, RAW makes all the difference in the world.

The ISO selected was the lowest possible for the given lighting conditions.  Chicago at night is brighter than most night time scenes which, along with the flash, allowed an ISO of 800 versus a 1600 or higher- despite the late hour of the day. 

The White Balance of 5650K was achieved using the AWB setting.  This setting was only appropriate because we colored the traditionally bright white flash with Rosco 16 light amber gel.  If we had not colored the flash, then the camera's AWB would have been less predictable, less appropriate, and more prone to error.  When using AWB with multiple light sources, always check your progress as you go to ensure that the camera is reading the color temperature from the correct portion of the image.

This image was shot with a tripod - a necessity for me under the lighting conditions and the weight of the lens used - which allowed me to use a shutter speed of 1/25.  The balance between the flash and the ambient lighting of the scene was achieved by using this slower shutter speed.  Had we fired the flash and shot at 1/100 or faster, the only portion of the image that would be appropriately lit would be the subject, illuminated by the flash.  To brighten the detail of the city and to match the ambient lighting to the flash, a slower shutter speed is perfect.  This is an example of how the camera and lighting design can work together, and why determining the balance of that lighting design was the most important step while creating this image.

A large aperture was ideal to allow for as low an ISO as possible to reduce noise.  With this particular lens, f/4 still provides a large amount of detail in the background, which is crucial to the intention of featuring not only the model, but also the surrounding environment.  

While we already discussed Flash in detail as the source of Key Light, it is important to note that the flash was triggered wirelessly with the Canon Speedlight Transmitter ST-E2.  This allowed me to utilize the ETTL features of the Canon system, which send metering information from the camera to the flash.   This also allowed me to get the flash off the camera, and exactly where I wanted it.  Because of the amber gel used, flash power settings were boosted or reduced as needed, by hand, (in this shot we were at +1 1/3) to achieve the appropriate final balance of light.  With the wireless system, you're not confined to the distances or whims of sync cords - allowing for much less setup time, but much more versatility and specific placement of the Key Light.  In all cases the flash was hand-held to allow for the most rapid transitioning between locations and distance from the subject as possible.

Understanding the Post-Processing

The first phase of editing is performed in Photoshop's Camera RAW.  This is where I make all edits that could traditionally be performed in a darkroom.  I can tweak exposure, contrast, color, depth of blacks, vibrance, etc.  With images shot at ISO 800 or higher, I traditionally perform Noise Reduction as well.  When working with Camera RAW, experiment with the appearance of the two Noise Reduction sliders.  I tend to prefer a 100% noise reduction with the color slider and leave the luminance slider at 0%.  This is a personal preference for the final appearance of the image.

In Photoshop I made small adjustments -- such as removal of threads and lint from the model's clothing -- and added a vignette.  The beauty (and reward) of putting effort into the creation of a lighting design is less post-processing!

Live Question & Answer Session 

One of the added benefits of our Digital Classroom is the ability to directly ask questions of the individuals that shot the images and interacted with the lighting and the subjects so many of you ask us questions about!  In response, we'll be hosting a Google+ Hangout tomorrow evening at 8pm CENTRAL time.  We'll both be available to answer questions about any of the topics covered above, as well as any questions you might have or develop as a result.  We both look forward to seeing you there!     

Friday, November 4, 2011

Camerapixo Issue 14

Check out our photos and profile in the current issue of Camerapixo... download it as a PDF on your computer, or iPad!  Inside you'll find our work as well as the work of many of our friends and favorite photographers from Google+.  Enjoy!


Wednesday, November 2, 2011

2012 Planners available for Pre-Order

We're excited to announce that this year we're offering 
2012 Weekly Planners 
featuring our photographs!

Planners are 5x8 and available in soft or hard cover.  
We have two planner designs that we're debuting...

...there's the dramatic Black and White Photography Planner
and the vibrant Color Photography Planner!

Both planners are available in soft cover for $30 and in hard cover for $50.  All planners feature a weekly format with 52 images, lots of room to write in appointments and notes, and year at a glance pages.


2012 Weekly Planner by Jordana Wright | Make Your Own Book

You can preview, order, or share the planners from our bookstore: http://www.blurb.com/user/JordanaW,
or contact us directly to place an order! 

Monday, October 31, 2011

Adalee's Senior Portraits - Sneak Preview!

We had a lovely Senior Portrait Session with Paris, IL senior Adalee last week!  Check out the Sneak Preview of her session... Enjoy!


Thanks again, Adalee for an excellent session!
For more information about photography sessions with us, visit jordanawright.com or call (217)686-4366.

Saturday, October 29, 2011

Chris "Hitman" Harris - Style in Chicago

Its not every day that you land a style shoot with one of the starters for the Chicago Bears.  Jordana Wright Photography had the distinct pleasure of shooting Chris "Hitman" Harris in downtown Chicago last week, after making his acquaintance on Google's latest foray into social media, the Google + network.  Much to everybody's surprise, the Bears actually cut Mr. Harris the following day, upsetting fans to no end, and generating a great deal of interest and speculation into his career and future.  Enter the Detroit Lions, who picked him up basically as soon as he was made available.  Meanwhile, Chris Harris became one of the top 5 trends on Twitter for a few days, and as a result our images are being viewed everywhere!  Best of luck to Chris and to his continued success both on and off the field.  
Best of luck to the Bears too- there's a "Hitman" coming to Chicago in a few weeks......  

Enjoy the sneak preview of his Style in Chicago Shoot below!  


Special Thanks To:

Chris Harris, Brad Williamson of the Virtual Biographers
and to Joan Kuhn for the usage of her breathtakingly gorgeous home.

Tuesday, October 18, 2011

Captain Don Bussart


Captain Don Bussart 1919-2011

A note that Cassius wrote last night:
"I write this now, at a true loss for words.

One of the greatest American heroes, patriots, gentlemen, fathers, and most of all, friends - has passed away from us this last weekend.

He flew airplanes in dangerous places around Southeast asia for over 40 years. He flew for Air America, he flew the Hump in Burma, he flew wooden prop planes in air races. He set the world speed record in an open cockpit prop plane at well over 500 MPH. He flew stunts for movies. He flew for the military, for private companies, for spies and soldiers, and for his own. He was the guy tapped to short runway land and takeoff for the Bay of Pigs. C-130, biplane, jet, glider, He just flew everywhere as often as he was able. I had the pleasure of working with the man alongside Jordana for a photoshoot featuring one of his vintage airplanes, a 1934 American Eagle eaglet.
If more Americans were like him, the country would be in much better condition.

The world is surely a poorer place now.

Rest In Peace,

Captain Don Bussart
December 18, 1919 - October 14, 2011"

Friday, October 7, 2011

Photowalk Chicago

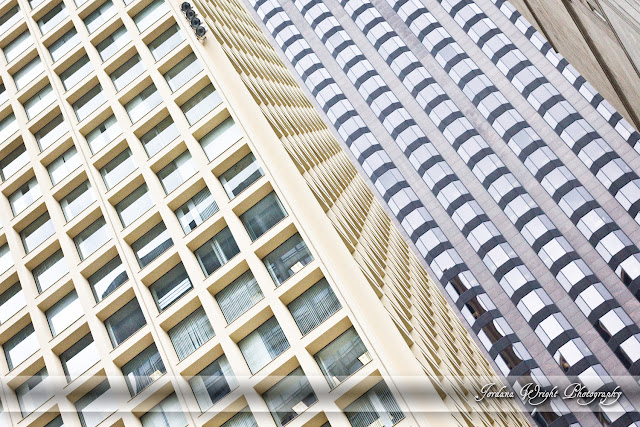
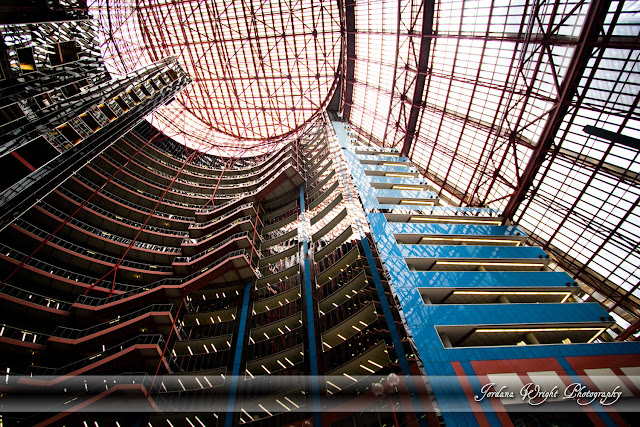
Last week we led a photowalk in Chicago for a few folks we've met on Google+.  We followed an architectural tour suggested to us by a contact from the Chicago Architecture Foundation which included: The Chicago Cultural Center, Chase Tower, The Chicago Board of Trade, Marshall Fields, among others.  

Here are the first few favorites from the day... 


Monday, October 3, 2011

Autumn in Wisconsin

After a very busy summer, we finally got some time off and took a trip to St. Germain, in northern Wisconsin.  The fall has made a lot more progress that far north and we got to see some beautiful autumn color!  Here are a few of our favorite photos from the trip... Check back for more later in the week!


Wednesday, September 14, 2011

Sneak Preview: Saundra & Matt's Wedding!

Last weekend we had the good fortune of photographing the New York wedding of our friends Saundra & Matthew.  It was a beautiful ceremony at the O'Byrne Chapel of Manhattanville College, followed by a fantastic reception at the Renaissance Westchester Hotel.  We got a small sample of their dynamic together last summer at their Engagement Session, and were delighted to be a part of their special day.  Take a look at the Sneak Preview we put together for them... Enjoy!


Congratulations, Matt and Saundra!  Enjoy the honeymoon!!!

For more information about Jordana Wright Photography, 
visit our website, or call (217) 686-4366.

Thursday, September 8, 2011

Sneak Preview: 2011-2012 PCHS Cheerleaders

Last weekend we had an awesome shoot with the Paris Cooperative High School Junior Varsity and Varsity Cheerleaders.  The squads were prepared, practiced, and a real pleasure to work with!  Check out the sneak preview of their session... Enjoy!


Thanks again to the PCHS Cheerleaders and Tanner Laughlin for such a great shoot!  
You guys are going to have an incredible season!

For more information about booking sessions with Jordana Wright Photography, 
visit www.jordanawright.com or call (217) 686-4366

Thursday, September 1, 2011

Pendulum Aerial Arts

Last week The Doudna Fine Arts Center in Charleston, Illinois opened their 2011-2012 season with an incredible aerial acrobatic and contortionist performance by Pendulum Aerial Arts.  The performance, entitled "High Art", was inspired by eight masterpiece paintings and told the story of the journey through various stages of life.  The costumes, music, lighting, and choreography complimented and enhanced the awe-inspiring agility and passion of the performers.  Here is a Sneak Preview of our images from the performance!  Enjoy!


Thank you to The Doudna Fine Arts Center, and 
Suzanne Kenney for inviting us to photograph the performance!

Friday, August 19, 2011

Sneak Preview: The Ives Family Portraits

We first met the Ives family two years ago for a Family Portrait Session on the beach.  Tim, Delia, Molly, and Ella are an amazing, fun, and photogenic crew.  We had a lovely reunion photo shoot at Bourne Farm in Bourne, MA with the excellent addition of Cooper, the family dog.  Here's the Sneak Preview of their session... enjoy!


Thanks again to The Ives for an incredible session!
For more information about Family Portrait Sessions with Jordana Wright Photography, 
visit JordanaWright.com or call (217) 686-4366.

Sneak Preview: Hannah's Senior Portraits!

Yesterday we posted the Sneak Preview for a Family Portrait Session with the Catania Family at Heritage Museums and Gardens.  We followed that session up with a Senior Portrait Session featuring Hannah.  Our session with Hannah was fantastic -- we had perfect weather, a beautiful location, and a total natural in front of the camera.  Take a look at the Sneak Preview of her session... Enjoy!


Thanks again Hannah for a fabulous shoot!

For more information about Senior Portraits with Jordana Wright Photography
visit jordanawright.com or give us a call at (217) 686-4366!

Thursday, August 18, 2011

Sneak Preview: Family Portraits with The Catanias!

Last week we had a lovely family portrait session with the Catania Family in Sandwich, Massachusetts.  On a beautiful, sunny morning, we explored Heritage Museums and Gardens with our friends Rob, Sheri, and their four children, Zach, Jordan, Hannah, and Brooke.


Take a look at the sneak preview from their session... Enjoy!


We followed up the Family Portrait Session with a 
Senior Portrait Session with Hannah... 
Check back for the Sneak Preview of her session tomorrow!

Thanks again to the Catania Family!  It's always a pleasure!


Friday, August 5, 2011

Sneak Preview: Senior Portraits with Haley Johnson

Yesterday we had a fabulous Senior Portrait Session with Haley!  She's super sweet, energetic, and very enthusiastic.  During her 3 hour session we explored her family's beautiful property, taking advantage of ponds, woods, and open fields.  Later, we shifted gears and took the shoot to the Paris, IL square, where we utilized the amazing textures, colors, and backdrops that the town has to offer.  We had a wonderful time, and really enjoyed getting to know Haley.  Take a look at the Sneak Preview we put together of her session...


Thanks again to Haley for such an awesome shoot!

For more information about Senior Portrait Sessions with Jordana Wright Photography, 
visit the Senior Section on our website, or give us a call at (217) 686-4366.

Wednesday, August 3, 2011

Understanding The Image -- Working with Available Light

Yesterday we released a sneak preview of a recent Senior Portrait Session at the Palmer House Hilton in Chicago, IL.  We've received a lot of positive feedback about the images, and decided to use the image below to respond to a few inquiries about our techniques, the lighting, and the post-processing used.  This is also the first post of our Digital Classroom Project, which will provide aspiring photographers with the resources and information they need to succeed!


Understanding the Lighting

Part of a successful on-location shoot is finding incredible lighting opportunities while working within the specific constraints you are given.  At the Palmer House Hilton, we were asked to shoot without a tripod, using only available light.  This presented a challenge, as the Palmer House is stylishly but dimly lit, and we only had one hour to shoot.  The specific location featured in this image provided both ample illumination and dynamic color to highlight the model in an interesting way.

Creating dynamic lighting is an interesting puzzle.  It involves a careful balance of color, intensity, source location, and angle of the lights themselves -- all of which must be perfectly in sync with each other to bring out the best qualities of the location and the model.  In this situation, the lighting was immovable, and the color, intensity, and angle were all set.  In these situations, it becomes a matter of moving the model within the light sources until the desired effect is achieved.  In a studio setting, one would be able to simply move the lights elsewhere, or perhaps decrease the intensity.  

Steps in creating a lighting design:
  1. Determine the Key Light.  The Key Light is the primary source of illumination for the photograph.  In this example the Key Light is the teal light from the model's right.  If you have one light to achieve your design objective, where would you put it, what color would it be, and from what angle?  The Key Light should satisfy those requirements.
  2. Determine the Fill Light.  The Fill Light serves to provide general illumination and balance to the photograph.  It highlights features, cuts down on shadows, and can provide a different color source in an image.  It helps to tone down the Key Light and makes it appear less harsh.  In this image, we have two colors of Fill Light -- a teal light from the Model's left, but farther from the Model than the Key Light (thus reducing intensity), and a white, ambient light from above the Model, to her front and left.
  3. Determine other lighting sources.  In this image, the third source of light is orange Back Light.  Often Back Light is used directly on a Model or a backdrop, but in this case the backdrop itself emits light, and spills it directly onto the floor.  The desired effect, which is to separate the Model from her surroundings, is achieved either way.  In this image, the Back Light is far enough away from the Model to provide a gentle illumination from behind, without influencing the color or intensity of the other light sources.  
  4. Determine the balance.  This is the most important step of all, and is best learned through practice, trial, and error.  Outside of the studio, the available lighting sources, venue restrictions, and desired effects will all greatly impact the balance of your lighting.  Every situation will be different.  That's what makes lighting and photography fun -- look forward to the challenge!   


Understanding the Posing

With the given lighting restrictions explained above, we wanted to utilize the space in a dynamic way that would showcase the model's strengths.  Our model has an honest, and engaging smile.  To best feature that, and provide a level of accessibility to the image, we shot  this image at the Model's eye level.  The posing of her arm provides a line through the image that leads the viewer directly to the model's face.  It also helps her interact with her surroundings while anchoring her in the space.  Because the lighting is a more intense teal on her arm, leading to a brighter, more white light on her face, her face becomes the focus of the image.  Unless your focus is something specifically different -- as with some product photography -- you always want the face to be the brightest part of the image.  By framing the shot off center, the image also becomes far more compelling -- providing asymmetry of color with the orange Back Light only visible to the Model's right.

Understanding the Camera Settings

This image -- shot with a Canon 60D and a 50mm 1.8 lens -- features the following settings:
  • RAW
  • ISO - 1600
  • White Balance - 6850*K
  • Shutter speed - 1/40
  • Aperture - f/1.8
  • Manual Focus
If you are a professional or serious amateur, shoot RAW.  The amount of flexibility it provides is due to the sensor capturing more of the available data and not compressing the file.  Files are bigger, so you'll need more storage, but RAW will save shots that you'd otherwise throw away.  

The ISO selected was the lowest possible ISO for the lighting conditions.  By sticking to the lowest possible ISO, you can limit the amount of noise or grain as much as possible.  

The White Balance of 6850 was achieved using the AWB setting.  AWB can be a blessing and a curse.  Sometimes, as seen with this image, the camera can determine a pleasing color that is very true to life.  Other times, what you see is not what you get at all.  Anytime you shoot with AWB, check your progress to make sure you're getting the colors the way you want them.  

The Shutter Speed of 1/40 is the slowest Shutter Speed I can personally shoot with this particular lens without blur or noticeable camera shake.  Every photographer should know what Shutter Speeds they can get away with when shooting without a tripod.  In order for the image to be correctly exposed, and to not need an increase to my ISO, I shot this image at 1/40.  If the lighting conditions, or the positioning of the model had changed, the Shutter Speed might also have changed.

Aperture is my favorite tool as a photographer.  The ability to adjust Depth of Field, demonstrating to the viewer what is really important in an image, is powerful.  With portraiture, I love to shoot with as large an Aperture as possible (remember large opening, small number).  In this case, the 1.8 not only provided a nice blur to the background, but also allowed as much light as possible to reach the sensor.  With the shallow Depth of Field that a 1.8 provides, it is important to be sure the subject is right in the middle of the area in focus.  There's nothing worse than a model whose nose is the only thing in perfect focus.

With my 50mm lens, I always shoot with Manual Focus.  If you trust your eyesight, it's the only way to go.  You'll be able to keep up with little variations in positioning that may throw the auto-focus off.  Manual focus is also quicker and quieter should the location of your shoot require you to be unobtrusive.  Because I specifically shoot Manual Focus, I check my diopter (the dial that allows you to adjust the viewfinder to match your eyesight) routinely.  This guarantees that your eye and lens are always in sync, greatly increasing the likelihood of capturing stunning, crisp images.    


Understanding the Post-Processing

Our Post-Processing has two important phases -- RAW editing, and Photoshop editing.  In the RAW editor, I make adjustments to the aspects of the image that you would have previously adjusted in a dark room -- like contrast, brightness, depth of the blacks, vibrance, etc.  This is where you would tweak color temperature and exposure to match what you saw at the time of shooting.  I tend to prefer high-contrast images in which colors are very vibrant.  I traditionally make RAW edits to brighten images, add contrast, and make colors pop.  It is important to learn the differences between the effects of the 'vibrance' and 'saturation' sliders.  Take time to experiment.  In the RAW editor, I also reduce noise as much as possible without losing detail in the image.  

Once the image is open in Photoshop, I create a new layer for every aspect of editing.  That way you can change opacity of specific adjustments, turn layers on and off to check for accuracy, and delete them if you're not happy with the effects.  I remove blemishes with the Patch Tool, Lighten under-eye circles with a paintbrush on a transparent layer, and - if needed - brighten teeth and eyes.  In portraiture for a non-commercial client, I never apply blur effects, or blur by hand any elements of the skin.  I believe that models should look like the best version of themselves, while maintaining the nuances that make them real.  I was asked by a fellow photographer from Google+ why I didn't remove the under-eye circles completely from this specific image.  Below you can see my final edited image on the left, and the image re-edited to completely remove the under-eye circles on the right.  The re-edited image feels artificial to me, particularly having met the model, who looks nothing like the girl on the right.  Some lightening of under-eye circles is standard, to make models look less tired, but it is important to maintain the shape of the area under the eye -- it keeps eyes from feeling like they are floating on the face.  Additionally, the facial expression in this image creates the shape and appearance of the eye -- images in which the model isn't smiling have less of a crease in the eye area.  To remove that crease makes the expression feel unbalanced and fake; in this case, removing the facial feature that provides the cheek some of it's shape makes the face look unnaturally flat.  The last thing you ever want as a photographer is to have your post-processing undermine the work you do at the shoot in posing, lighting, and composition.  To complete most images, I add a vignette effect to draw further focus to the appropriate portion of the image.


Jordana Wright Photography offers thanks to our followers on 
Google+ for asking interesting and inspiring questions!  
Please comment below with any additional questions or ideas you may have.
Check back soon for more "Understanding The Image" posts 
from our Digital Classroom Project! 

Tuesday, August 2, 2011

Sneak Preview: Style in Chicago with Rio!

One of the cool things about Jordana Wright Photography is the ability to do ANYTHING you want for your senior portraits.  With that in mind, local PCHS Senior, Rio decided she wanted to step things up a bit and use the amazing locations offered up by visiting downtown Chicago!  This sneak preview showcases a few of the 150 final images included in her package.  Besides shooting all over the streets of Chicago, we specifically focused on some fantastic locations near Trump Tower, Millennium Park, and the historic Palmer House Hotel.

The Palmer House Hotel was a real treat and a special opportunity for all of us, because under normal circumstances, Hilton doesn't allow any photography other than basic vacation snaps in their lobby.  Fortunately, (and thanks to the legendary PR master and Chicago historian, Ken Price) we were given an hour to shoot inside with some of the Palmer House's most famous features as our backdrop!  Be on the lookout for killer photographs around the famous Tiffany-designed Peacock Doors, the Spiral Stairs, the grand Main Lobby, and other amazing shots outside of Potter's Lounge -- one of Chicago's trendiest spots to see and be seen by all types of famous people :-) 

Check out the sneak preview of Rio's incredible session!


Thanks again to Rio for another amazing session!

For information about booking your own Style Session in a city of your choosing for your Senior Portraits, just visit www.jordanawright.com/seniors.html or call (217) 686-4366.

Monday, July 25, 2011

Some more from Canada's capital city...

Last week I posted a few of our photos from our trip to Ottawa... we've been getting through them slowly but surely.  Keep an eye out for a massive increase of photos and prints for sale on our website.  More photos coming soon!

Mer Bleue Conservation Area, Ottawa

Mer Bleue Conservation Area, Ottawa

Parliament Hill, Ottawa

Downtown Ottawa

Off the Rideau Canal, Ottawa

Sparks St., Ottawa

Berries at the Byward Market, Ottawa

Gatineau Park, Gatineau Quebec

Hog's Back Falls, Ottawa

Parliament Library, Ottawa

Parliament, Ottawa

Thursday, July 21, 2011

Ottawa!

We just returned from a trip to Ottawa -- Canada's capital city.  Cash and I fell in love with the city's architecture, natural sights, incredibly friendly people, and the ridiculously good food!  We've been posting loads of photos for our 6,300 followers on Google+ (our new favorite social media site), but don't want the blog or facebook followers to feel left out... so here are a bunch of our favorites from the trip so far!  Many more coming soon!